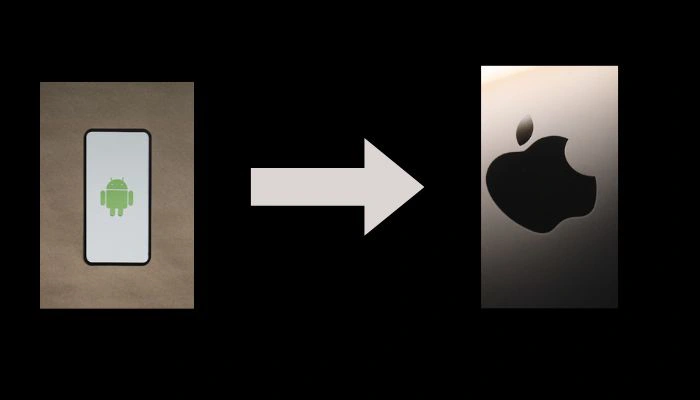
How to Convert an Android App to iOS in 5 Easy Steps
The world of mobile applications is a two-horse race, with Android and iOS dominating the market. For businesses and developers, having a presence on both platforms is no longer a luxury—it's a necessity. An app that succeeds on one platform is a proven concept, but to truly maximize your reach, revenue, and user base, you must expand your horizons. Ignoring either the Google Play Store or the Apple App Store means leaving a significant portion of the global smartphone market untapped.
While the desire to tap into the lucrative iOS ecosystem is strong, many wonder if it's possible to simply convert an Android app to iOS. The short answer is: not directly, but the process is more of a strategic porting and rebuilding effort than a simple one-click conversion. This guide breaks down the complex journey into a clear, manageable, five-step process. We will walk you through the essential stages of analysis, redesign, development, and testing, so you can confidently bring your Android app to the iPhone and iPad.
If you’re ready to unlock new markets, increase your user acquisition, and provide a seamless experience to Apple's discerning audience, then read on. This comprehensive guide will equip you with the knowledge needed to successfully convert an Android app to iOS and set your app up for success in the App Store.
Understanding the Core Differences: Why You Can't Simply Convert an Android App to iOS

Before diving into the steps, it's crucial to understand the fundamental reasons why a direct conversion is not feasible. Android and iOS are built on different operating systems, use different programming languages, and adhere to distinct design philosophies. Trying to "translate" code line-by-line is like trying to translate an entire novel with a dictionary—you lose all the nuance, flow, and context.
Here's a breakdown of the key differences that necessitate a strategic approach:
- Programming Languages: Android apps are primarily written in Java or Kotlin, while iOS apps are built using Swift or Objective-C. These are entirely different languages with unique syntax, libraries, and frameworks. You can’t simply run Kotlin code on an iOS device.
- User Interface (UI) and User Experience (UX): Apple's "Human Interface Guidelines" and Google's "Material Design" are two distinct design languages. Android's UI often features a more hierarchical, boxy design, whereas iOS favors a minimalist, "flat" design with different navigation patterns (e.g., tab bars at the bottom vs. navigation drawers). A simple replication of the Android UI on an iPhone will feel unnatural and clunky to iOS users, leading to a poor user experience.
- Device Fragmentation: Android has a vast ecosystem of devices with varying screen sizes, resolutions, and hardware capabilities. iOS, by contrast, has a limited, standardized set of devices (iPhones, iPads). This fragmentation impacts how your app needs to be coded and tested to ensure it looks and performs well on all devices.
- App Store Guidelines: The Apple App Store has stringent and often more rigorous review policies than the Google Play Store. Apps must meet specific performance, security, and privacy standards, and any deviation can lead to rejection.
Acknowledging these differences is the first step toward a successful porting project. The goal is not a carbon copy but a native-feeling app that provides the same core functionality while embracing the nuances of the iOS platform.
The 5-Step Process to Successfully Port Your Android App to iOS

Converting your app to a new platform requires a methodical and well-planned approach. Skipping steps can lead to technical debt, a poor user experience, and a failed App Store submission. Here are the five critical steps to follow.
Step 1: Pre-Conversion Analysis and Project Planning
The first and most important step is a comprehensive analysis of your existing Android application. This is where you determine what you need to rebuild, what you can reuse, and what needs to be adapted.
- Conduct a Technical Audit: A detailed code review of your Android app's architecture, including its backend, APIs, and third-party integrations. Identify any platform-specific dependencies (like Google Maps API or Android-specific libraries) that will need to be replaced with their iOS counterparts (e.g., Apple Maps, UIKit, etc.).
- Feature and Functionality Mapping: Create a list of all your app's features and categorize them. Which features are essential? Which ones are platform-dependent? This will help you prioritize the development work and ensure you don’t miss anything during the migration.
- UX/UI Redesign: Don't just copy the visuals. This is the time to hire a UX/UI designer experienced in iOS to create a new, native-feeling design that aligns with Apple's Human Interface Guidelines. This includes rethinking navigation, button placement, and visual elements to provide a familiar and intuitive experience for iOS users.
- Team and Resource Allocation: Based on your analysis, define the scope, timeline, and budget for the project. Assemble a team of experienced iOS developers, a project manager, and a QA specialist. This is a significant undertaking, and having the right people on board is paramount.
Step 2: Codebase and Back-end Re-Engineering
With a solid plan in place, the development work begins. This step involves building the new iOS app from the ground up, using Swift or Objective-C.
- Write the New Code: Your Android code cannot be directly translated. The logic and business rules will be re-written in Swift. If your app uses a cross-platform framework like React Native or Flutter, a significant portion of the code might be reusable, but the native UI components and platform-specific features will still require dedicated iOS development.
- Integrate with the Backend: If your app has a server-side component (API, database), ensure that the new iOS app can seamlessly integrate with it. Test API calls, data handling, and server responses to avoid any performance issues. Some back-end changes might be required to accommodate the new app’s structure or to optimize data transfer for iOS.
- Replace Third-Party Libraries: All third-party services and libraries (payment gateways, analytics, social media integrations) must be replaced with their iOS-compatible versions. For example, if you used Google Sign-In, you’ll need to implement Sign in with Apple and other relevant iOS authentication methods.
Step 3: UI/UX Development and Design Adaptation
This step is all about making the app look and feel like a true iOS application. A great user experience is what sets successful apps apart.
- Implement the Redesigned UI: Using Xcode and Swift, your developers will build the new user interface. This is where the work from the design phase comes to life. Pay close attention to subtle details like animations, gestures, and the use of native iOS components like tab bars and navigation controllers.
- Ensure Responsiveness: Since iPhones and iPads have different screen sizes, your app's layout must be adaptive. Utilize Auto Layout and SwiftUI to ensure the interface looks great on any Apple device, from the smallest iPhone to the largest iPad.
- Optimize for Platform-Specific Features: Leverage unique iOS features to enhance the user experience. This could include integrating with Face ID/Touch ID, Siri shortcuts, Apple Pay, or Haptic Feedback. This is a critical step to ensure your app doesn't just function but truly feels at home on an iOS device.
Step 4: Rigorous Testing and Quality Assurance
Before you can submit your app, it must undergo thorough testing to ensure it is bug-free, stable, and performant.
- Functional Testing: Ensure that every feature, button, and user flow works exactly as intended. Compare the functionality of the iOS app against the original Android version to make sure nothing was lost in translation.
- Usability Testing: This is a crucial step to validate the new UI/UX design. Have real users test the app to identify any confusion, friction points, or design flaws. Their feedback will be invaluable for making final adjustments.
- Performance Testing: Check the app’s speed, memory usage, and battery consumption on various iOS devices. A slow, memory-hogging app will not be approved or will quickly receive negative reviews.
- Security Testing: Ensure all user data is handled securely and that your app is compliant with Apple’s strict security policies.
Here is a table summarizing the testing phases:
| Testing Phase | Goal | Key Activities |
| Functional Testing | Validate all features work correctly | Test every button, form, and user flow; Compare functionality to original app |
| Usability Testing | Ensure the UI is intuitive for iOS users | A/B testing, user interviews, and feedback sessions |
| Performance Testing | Verify app speed and efficiency | Measure loading times, memory consumption, and battery usage |
| Security Testing | Protect user data and ensure compliance | Check for vulnerabilities, secure data storage, and network communication |
| Compatibility Testing | Confirm functionality on all devices | Test on different iPhone and iPad models and OS versions |
Step 5: App Store Submission and Maintenance
This is the final hurdle. The App Store submission process has its own set of rules and challenges.
- Prepare for Submission: Gather all required assets, including app icons, screenshots, privacy policy links, and a compelling app description. Write a detailed review note for the App Store team, highlighting your app's key features and how it works.
- Submit for Review: Use Xcode to upload your app build to App Store Connect. The review process can take a few days, and your app may be rejected if it doesn’t meet all the guidelines. Be prepared to address any feedback or rejection reasons promptly.
- Post-Launch Maintenance: The work doesn't stop once your app is live. You must continually update the app to support new iOS versions, address user feedback, fix bugs, and add new features. Regular maintenance is key to long-term success.
Final Considerations and Expert Tips
Converting an Android app to iOS is a significant investment of time, money, and resources. While it is not a simple drag-and-drop process, the rewards are immense. By strategically porting your application, you can double your potential user base and enter one of the most profitable mobile markets. The most successful apps on both platforms are those that embrace the unique characteristics of each ecosystem. Don't settle for a sub-par user experience; invest in creating a high-quality, native app that iOS users will love.
If you’re a business owner or a developer ready to take your app to the next level but find the process daunting, remember that you don't have to do it alone.
Ready to expand your market reach and elevate your app's success? Contact our team of expert developers today for a free consultation and a detailed plan to convert your Android app to iOS.


